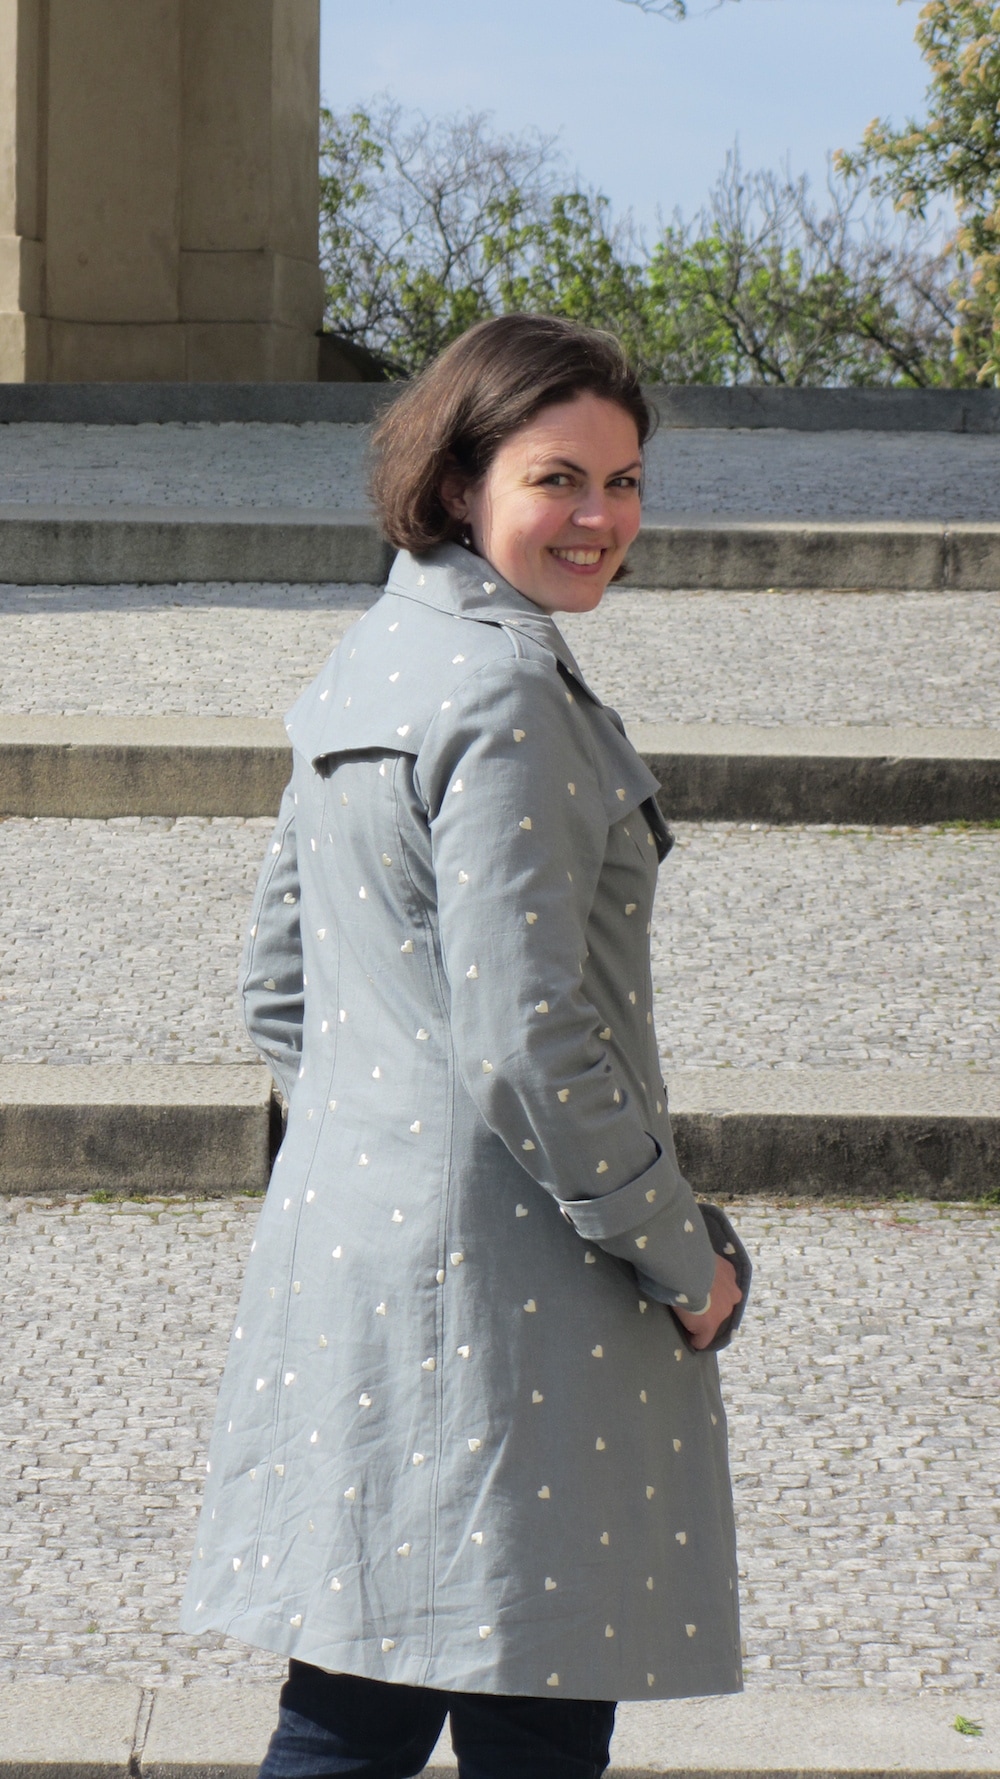
Completed: The Evergreen coat
I made another coat! May I present my Evergreen Robson trench coat, the first piece of sensible, needed sewing I’ve done in quite a while. I love trench coats and have been without one for about a year as the front balance on my RTW one was off and it kept riding up. Annoying doesn't cover it so it sat in my wardrobe unused until I finally threw it into the charity bag. Needless to say throughout that time the Robson coat was at the top of my sewing list.
I finally got my hands on the pattern at Christmas but just couldn’t decide on the style I wanted. Classic? Statement? The recreation of a black and white gingham one from my university days? (Yes, it was as good as it sounds.) I landed somewhere nearer classic than statement or classic with a subtle twist. I stumbled across this gorgeous sage green twill with cream embroidered hearts at the Fabrics Galore stand in Birmingham. It is about the right weight for a trench coat, is quite warm and dries reasonably quickly but it has a habit of developing wrinkles - not that it takes anything away from the finished look imho. I've called it Evergreen as I think I can wear it through spring, summer and autumn. I'm not going to lie, I love this coat and therefore included more photos than normal.
The fit of this coat was important to me. I don’t like a lot of fabric around my waist so I cut a smaller size than my measurements. I then made my standard Sewaholic alteration of grading down another size at the hip. No other alterations were made until the coat was together when I took up the hem by an inch to hit my knees and took up the sleeves the same amount. Looking back, I should probably have raised the pockets a bit and made them slightly bigger - my hands only just fit in them!
I made this slowly over a number of weeks as the road to completion is a long one with a great many steps. Cutting out takes time, especially when you have to take a break after accidentally standing on the fabric and a pin decides to take a long walk straight into your foot! However, don’t let that put you off. The instructions for creating this coat are everything you would expect from Tasia - they are clear and easy to follow. You can even streamline the process a little bit by sewing a number of seams before rethreading your machine for the binding. I did wonder about how bulky it would be around the neckline as some of my other makes have struggled with this. I didn’t have to worry, it all fitted nicely together under the needle even with the addition of sew in interfacing (which I like. So much easier to use than the fusible stuff).
I decided to leave my coat unlined as the bound seams are one of my favourite features for this pattern. I also knew it would be a great way to perfect my edge stitching. I love the way Tasia suggests you bind the seams (fold the binding in half, place along the seam and stitch) as it takes half the time as the normal way of attaching binding. Or it would if you didn’t decide to hand baste it in place first… I used a slightly wider cream binding to make the tape easier to catch on the other side and pressed it in half before slipping it over the seam allowance. You also need to love top stitching! I’m delighted with how even and straight my stitching is - even when there is the added bulk of the hearts. I got away from the slowest speed on my machine and that feels like substantial progress! The button holes were relatively easy to make although I had to move a couple by a few millimetres to avoid the hearts. I chose some pewter buttons with stars on from Darn It and Stitch for the finishing touch.
Be aware, the cost of this coat can add up very quickly. With five metres of fabric, over 10 metres of bias tape, buttons, thread and sew in interfacing the total quickly added up to somewhere between £60-70. While this sounds a lot, I chose to invest in the fabric so I could make a coat that would last me years.
Confession time: the coat in the pictures is not the completed one. I needed the coat to be in a wearable condition for my Easter break in Prague but I knew I wouldn't complete it properly. I have since finished the arm hole seam allowances, added the belt loops and hand tacked the facings and hem in place. You can catch a glimpse of the bias tape and the amount of wrinkling in the photo above. I may, or may not, have stitched one of the sleeve tabs to the wrong side of the sleeve and had to correct that when I returned.
This is one of my best makes, potentially the best to date, and I have worn it nearly everyday since it became wearable. I’m still in love with the fabric - the hearts make it more interesting without being overwhelming. The fit is spot on and I’m delighted with my stitching. The pockets are the best in seam ones I have produced and they have almost perfect welts! All it needs now is a label. I really should get some woven ones...
Tell me, what is your best make to date?


